25 August 2011

Book Review - The Family Meal Table and Hospitality.


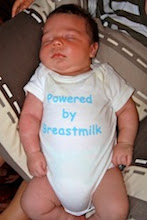
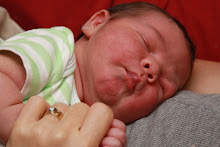
With CJ’s birthday a week ago, I paged through my photo albums and got real nostalgic about my almost grown-up Son!   But I got even more nostalgic when I looked at pictures of CJ and my Dad.  


My Dad had only two daughters, and I could tell he missed having a son very, very much.  Needless to say he was overjoyed when CJ was born - his first grandchild and also the taste of what it would be like to raise a son! 


Sadly my daddy died when CJ was only 9 years old, due to lung cancer...

As I cherished the memories, longed for my Dad and cried a little, my mind went back, way back to when I was still a little girl. He was such a fun guy!  Must be were CJ, as well as Josua, got their mischief!  He loved horses - does it surprise you that CJ loves horses? Then there were the countless times he would leave work in the middle of the day when I called him in distress and need.  But what I remember most, is our family meal table.  Daddy left every morning 06h00 sharp, for work, winter and summer!  Thus we didn’t see him in the morning, but he would be home at 17h00.  Dinner would be served immediately after Daddy washed his hands and then my Mother would ask him about his day and he started elaborating on his day at work.  He really had a way to intrigue us with his daily doings.  In the summer after dinner he would leave the table and go check on the huge vegetable garden he run part time. But in winter months he would take the big family Bible and read us the story of Josua, David or Daniel or he would read out of his favourite book in the Bible, Psalms.
How grateful I am for these special memories around the Family Meal Table, from my very young childhood years.
Unfortunately my Dad sold our farm when I was 13 years old and we moved to the city.  There the special hour around the family meal table slowly started to fade away. The country life is so much different from the city life, especially since there are so much more that compete for our time.  My sister and I were now involved in extra murals, which often ran late into the afternoon or started in the early evening; my mother was involved with the church and had to be at early evening meetings often; my dad had his duties as Elder in the church and their evening meetings. Often my mother was so busy in the afternoons, she didn’t have time to prepare a meal from scratch, like on the farm, and only made ‘one-dish meals’ which we then ate in front of the television.  And so we missed out on the very special time of nurturing our souls and spirit, while nourishing our bodies at the family meal table.
Over the past twenty five years live got even more busy! Families don’t gather around the Family Meal Table anymore! 

What is standing in the way of families to gather around the Family Meal Table?
- Mothers got brainwashed by the World’s thinking that preparing meals day after day is a wasting of precious time;


- Mothers don’t have the vision that they should teach their children the lifeskill of preparing a meal. Children learn by watching their mother and then prepare a meal themselves, which are enjoyed in each others company (complimenting the Young Cook all the way) around the Family meal table;


- Due to the previous point, young mothers today have no idea how to cook a good wholesome meal, they just pay frequent visits to the local fast food restaurant, instead of going through the painful exercise of learning to cook;


- Mothers are not home to prepare a meal, or don’t have time to lay a beautiful table with an inviting atmosphere where the meal can be enjoyed in each others company;


- By the time the meal need to get started, mothers are still trapped in late afternoon traffic due to the children’s extra mural activities or their own outings;

- By the time the meal should be served, family members are scattered everywhere, all doing their own thing;


- Apart from extra mural activities, television is one of the strongest competitors for the family meal table.  Soaps and talk shows are preferred above the precious company and conversations with family members.  After all, it is so much easier to prepare a quick one-dish-meal and ‘enjoy’ it in front of the television, than preparing a nutritious meal and sit at the family meal table.

Does this sound familiar?  It is interesting for me to observe in how many homes the television is the dominant ‘family member’, the ‘determiner’ of the atmosphere of the home, the ‘constant entertainer’, the ‘central piece of furniture’ in the home. Switched on the moment a family member walk into the home, or even worse, is never switched off!
Most families who stayed close over the decades will testify that the family meal table was the most central piece of furniture in their home - not the television - and the focal point that kept them together as a family.


Unless the Mother and/or Father have the vision to guide and shape the lives of their children with their personal involvement, the Family Meal Table will be empty in the evening.

And therefore I’m so thankful for the Family Meal Table and Hospitality study guide by Nancy Campbell.  

Do you know how the Lord pictures a family that is blessed?
In Ps 128:1-4 He takes us to the window of a blessed family’s home and invites us to peep in and see what’s happening. What you see there is a glimpse of the kind of family that He wants to bless, the family that is happy together.
“1 Blessed is every one who fears the LORD,
         Who walks in His ways. 
         
 2 When you eat the labor of your hands,
         You shall be happy, and it shall be well with you.
 3 Your wife shall be like a fruitful vine
         In the very heart of your house, 
         Your children like olive plants 
         All around your table.
 4 Behold, thus shall the man be blessed
         Who fears the LORD. “
Ps 128:1-4 NKJV
Do you see the picture?  Where is the wife?  She is in the very heart of her home! 


Where is the children?  They are all sitting around the table together!

The family table is a gathering place.  


A seat of learning. 


The hub for family activities. 


The heart and soul of communion and fellowship. 


Most of all, it is a biblical principle that God established.
How I enjoyed learning the origin of the table through the Family Meal Table and Hospitality study guide!
The table’s origin is in heaven.  God thought of tables long before we ever had them on earth. They are His idea!
 “I say to you that many will come from east and west, and recline at the table with Abraham, Isaac and Jacob in the kingdom of heaven;”
Matthew 8:11 NAS
I believe God wants us to renew our vision for the Family Meal Table.  It is more than a place to eat a hurried meal on the run.  The table is a feeding place.  
A feeding place for our family’s physical needs.  
This means preparing and cooking a meal. And this means work! 


Dear mother, cooking is a big part of your mothering career.  This is how we nurture our family. How often I see families who are sick for weeks in a row, sometimes a whole season.  Mothers who don’t have energy to take up the responsibilities of being a mother to their little children.  Babies who are colic, suffer from ear and respiratory infections, ending in antibiotics and operations like ‘grommets in the ears’ or the removal of their tonsils.  Many of these can be avoided, if we mothers, can renew our minds from the deception by our modern age vain philosophies and prepare nutritious meals for our husbands and children. 

In the 2nd chapter of the Family Meal Table and Hospitality there are excellent tips on cooking your meals, as well as how to plan your meals.
The table is a feeding place to feed the soul and mind!  
The table is synonymous with intimate communions and fellowship.  
It is where we speak heart to heart.  
It is where we sharpen one another’s minds.  
It is the heart and soul of family life. 


It is God’s way of keeping us together.
God loves this time of the day too.  This was the time of day He chose to visit with Adam and Eve - to talk and fellowship with them. God still loves to come and visit with His redeemed people during the “cool of the day”.  He loves to join them for their evening meal and reveal Himself to them. How sad when He finds the home empty, the family still on the road.
Chapter 3 with it’s excellent ideas of how to make your table a ‘heart and soul’ place, will renew your mind.
The Family Meal Table is a sanctuary.  
A secret place from the daily world of strife and filthiness.  Our husbands and grown children may spend their day out in the work place.  More often than not they are surrounded by filthy talk, jesting, immodesty and humanistic reasoning.  If they come home and turn on the TV, this contamination of the world will only sink deeper into their spirits.  But if they arrive home to a waiting table - a table that welcomes them with good food, love and fellowship, the filth of the day washes away. 

The preparing of the food and eating of the meal together, paves the way for the culmination of the meal - feeding the spirit.  God loves to present Himself at the table of the family that fears the Lord.  He loves to reveal His truth to us as we open our hearts to Him and talk of His wondrous ways.  Every time Jesus revealed Himself to His disciples after his resurrection, was when they were reclining at the table.  
Chapter 4 is filled with ideas how to feed the spirit.
The following chapters aim to enlarge your vision, looking at TABLE as an acrostic and discuss each word!
Part II of The Family Meal Table and Hospitality focus on Hospitality - God intend our table to be an extended table!  

Nancy focus on questions like:
Who Should Show Hospitality?
To Whom Should we Show Hospitality?
How Should we Show Hospitality?
How Should we Prepare a Guest Room?
Excuses for Hospitality.
The Blessings of Hospitality.
Ideas for Hospitality.


Christian Etiquette when Receiving Hospitality.
Part III of The Family Meal Table and Hospitality had an addendum on:
Herbs and Foods Mentioned in the Bible
Guidelines for Optimum Health


Should we Store Food?
The Celebration Meal
Dear Mother, through this excellent study guide - at the end of every chapter there is Scripture and questions - you will catch the vision!  You will understand God’s vision for the table, and it will make the time and effort cooking the meal worthwhile. 
You are not only cooking a meal, you are creating an atmosphere for the presence of God and for divine revelation. 

I would like to give all my Readers a Promotional offer on the Family Meal Table and Hospitality.  
For the next two weeks this excellent study guide, normal price R 135, will be only R99!
E-mail me with this code: FMTH2011
Offer ends the 8th of September.

With love
Linnie


20 August 2011

The Chocolate Cake and Review on the "Baking"-book


On the 17th of August, CJ turned 17.  


Last year Heidi-Mari did a course on baking from “Baking” by James Peterson.  This book covers Cakes; Pies, Tarts and Pastries; Cookies; Breads, Quick Breads and Bread-Based Desserts; and Custards, Soufflés, Fruit Curds and Mousses.  We learned so much from this book, which is filled with 350 recipes and techniques on baking, illustrated with 1500 photographs.  Since I’m a Visual learner, the photographs makes me understand his techniques like I’m standing next to him in his own kitchen.
Through out last year we learned about the different basic cakes. 


Did you know while there are hundreds of different kinds of cakes, there are really only six basic kinds? 
Did you know virtually all cakes and pastries are made up of four basic ingredients, but the amazing variety is the result of manipulating the four basic ingredients in different ways?


Heidi-Mari and I had a ball playing around with the different kinds of cakes.


We learned basic techniques which we now apply to any recipe in any other recipe book, though we prefer to bake from the ‘Baking’ book.


Next were various frosting, fillings and glazes. This opened a whole new world of decorating a cake.  


We were in the habit of using only one filling for our cakes, but a cake can be made so much more dramatic by using two or more in the same cake.

The part on assembling cakes put our baking in a totally new league.  


The kind of cakes you see in coffee shops, were now possible for us to create too!  
So when CJ asked if he could invite friends over for coffee on his birthday, Heidi-Mari handed him the book. He could choose a cake with any kind of filling, frosting or glaze in any combination he fancied.  And he did just THAT!  

He chose his favourite cake, a chocolate sponge cake (made with 85% Lindt chocolate), a hazel nut meringue, buttercream flavoured with a nut butter, chocolate mouse and chocolate glaze.    Next Heidi-Mari and I brainstormed on how to incorporate all these into a cake.  

We enjoyed it so much, working on this cake - it took us two days - but the end product was amazing and mouth watering delicious!
I thought I’d share it with you.

You will need: 
1 Chocolate Sponge Cake (at least 9 inches in diameter)
5 cups Pecanut flavoured buttercream
1 ½  cups coffee liqueur flavoured simple syrup
2 dacquoise disks
2 cups rum flavoured chocolate mousse
1 cup dark chocolate glaze (prepare just before assembling the cake)
left over cake crumbs
A springform pan
Recipes:
Chocolate Sponge Cake
(makes 2 round layer cakes - 9 x 1 ½ inches)
Butter and flour for the cake pans
225g (8 ounces) bittersweet chocolate (I used 85% Lindt chocolate)
1 cup cold water
8 eggs, slightly warmed
1 cup sugar
1 ½  cups cake flour
- Preheat the oven to 180 degrees C. Butter and flour two 9 by 1 ½ inch round cake pans.
  • Combine the chocolate and water in a small saucepan and heat the mixture over low heat while stirring with a wooden spoon for about 5 minutes, or until the mixture thickens to the consistency of smooth pudding. Remove from the heat. 
  • Combine the eggs and sugar and beat on high speed with a stand mixer for about 12 minutes or with a handheld mixer for about 20 minutes, or until quadrupled in volume and the ribbon stage: when the beater is lifted, the mixture falls in a wide band onto the surface, forming a figure eight that stays for 5 seconds before dissolving.
  • Using a rubber spatula, fold the chocolate mixture with the eggs while sifting the flour over the mixture. Alternate between adding flour - about one-fourth at a time - and folding until the flour is no longer visible.
  • Pour the batter into the prepared pans.
  • Bake for about 25 minutes, or until a toothpick inserted in the center comes out clean.
  • Detach the cakes from the sides of the pans by running a metal spatula or small knife around the edges.  
  • After the cakes have cooled for 10 minutes, turn them out onto a cake rack.
Simple Syrup
(makes 1 ½ cups)
¾  cup sugar
¾  cup hot water
4 tablespoons or more Chocolate liqueur or fruit brandy
  • In a bowl, combine the sugar and water and stir until the sugar is completely dissolved.
  • Let the syrup cool to just slightly warm, or chill it over a bowl of ice water, and add the chocolate liqueur.
Professional-Style Buttercream
(Makes 5 cups)
2 cups sugar
⅔  cups water plus more as needed
8 egg yolks, slightly warmed
1 ½  cups cold butter, cut into cubes
Pecanut butter for flavoring
  • Put the sugar and water in a heavy-bottomed saucepan and bring to a simmer over medium heat.
  • While the syrup is cooking, in a stand mixer fitted with the whisk attachment, beat the yolks on high speed for about 8 minutes, or until they have quadrupled in volume and are very pale.
  • While the egg yolks are beating, check the syrup for the softball stage, with a thermometer it should measure 114 degrees C. If the syrup is ready before the egg yolks, add 1 tablespoon of water to the syrup and keep simmering.
  • When the syrup and yolks are ready, turn the mixer to high speed and pour the syrup into the yolks between the whisk and the sides of the bowl.  It is important to keep the syrup from touching the whisk or the bowl because it will harden into little globules, which will break off into the buttercream.  (Don’t worry, a few are unavoidable.)   Continue beating the egg yolk-sugar mixture until it is just slightly warmer than room temperature (hold your hand on the bottom of the mixer bowl; ideally, it should feel neither hot nor cold).
  • Turn down the mixer speed to medium and add the butter cubes, a small handful at a time.  Wait until each batch is absorbed before adding more.  Beat for about 10 minutes, or until smooth and fluffy.  
  • Beat in a 1/4 cup nut paste per 1 cup buttercream until fully incorporated.
Hazelnut Meringue (Dacquoise)
(makes 3 round meringue disks 9 by ¼ -inch)
1 ½  cups hazelnuts or blanched almonds
1 ¼  cups sugar
3 tablespoons cake flour
Butter for the tart rings
8 egg whites
Pinch of cream of tartar, unless using a copper bowl
  • Preheat the oven to 180 degrees C.
  • Place the nuts on a baking sheet and toast them for about 15 minutes, or until you can smell their aroma. Remove and set aside to cool.  Turn down the oven to 135 degrees C.
  • In a food processor, grind the nuts with ½ cup of the sugar and the flour for about 1 minute, or until the nuts turn into a fine powder.  Take care not to process them until they become oily.
  • Butter three 9 inch tart rings and set them on parchment paper-lined sheet pans.  If you don’t have 9 inch tart rings, draw circles on the parchment paper and turn it over on the sheet pan.
  • In a stand mixer fitted with the whisk attachment, beat the egg whites and cream of tartar (if using) on high speed for about 4 minutes, or until stiff peaks form.  Then beat in the remaining sugar.  Continue beating for about 1 minute more, or until the egg whites are stiff and shiny.
  • Transfer the egg white mixture to a large bowl and fold in the nut mixture with a rubber spatula.
  • Fit a pastry bag with a ⅓  inch plain tip and fill it with the meringue.  Starting at the center of each tart ring or circle, pipe the meringue, gradually working out in a spiral pattern, until you have filled the ring or circle. 
  • Smooth the tops of the disks with an offset spatula.
  • Bake for about 90 minutes, or until the disks are hard, crisp, and pale brown and the center is firm to the touch.  If at any point the dacquoise starts to look too brown, turn down the oven to 100 degrees C. Let cool.
  • If you’ve used tart rings, slide a knife around the inside of the rings and pull the rings off.  Peel away the parchment paper.
Classic Chocolate Mousse
(Makes 3 cups)
170g bittersweet chocolate, chopped
¼ cup plus 2 tablespoons butter, cubed or sliced
4 egg yolks
3 tablespoons sugar
1 teaspoon vanilla extract of rum extract
1 cup heavy cream for whipping or more as needed to thin the chocolate mixture
  • Combine the chocolate and butter in a heatproof bowl.
  • Set the bowl over a saucepan of barely simmering water and stir with a wooden spoon or whisk until melted and smooth.
  • Take the bowl off the heat, leaving the saucepan of simmer water on the stove.
  • Combine the egg yolks and sugar in a heatproof bowl and set it over the saucepan of barely simmering water.
  • Whisk for about 5 minutes or until pale and slightly stiff.  
  • Remove from the heat. 
  • Stir the chocolate mixture into the egg yolks. add the vanilla, and stir until well mixed.  If at this point the mixture becomes stiff or grainy, whisk in heavy cream or water, ¼ cup at a time, until the mixture is smooth.  Stir for a few minutes to cool.  Let cool to room temperature.
  • Whip the cream to soft peaks.  
  • Stir about one-fourth of the whipped cream into the chocolate mixture and then fold in the rest with a rubber spatula.
  • If you are using the mousse as a layer in a cake, you can use it right away provided you are making your cake in a springform pan or cake ring, which will hold the mousse in place; otherwise, chill the mousse for at least 1 hour before you use it.  (I did both)
Dark Chocolate Glaze
(makes 1 ⅓ cups)
225g bittersweet or milk chocolate, chopped
½ cup butter, cubed or sliced
  • Melt the chocolate and butter in a heatproof bowl set over a saucepan of simmering water.
  • Stir with a rubber spatula until smooth.
Assembling the Cake
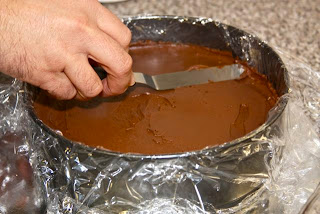
  • Have ready a 9 ½-inch springform pan (to allow room to apply frosting to the sides).
  • Line the springform pan with plastic wrap.
  • Cut the layer cake in half crosswise, using a serrated knife.  Reserve the bottom layer for the top layer of the cake.  
  • Start by placing the top layer of the cake on the cardboard or springform pan bottom.
  • Brush the layer of cake with half of the simple syrup.
  • Fit a pastry bag with a ⅓ inch plain tip and fill with 2 cups of the buttercream.  Pipe on a layer of the buttercream in a spiral.  
  • Spread it with an offset or regular metal spatula.
  • Press a dacquoise disk on top of the buttercream.
  • Spoon all the chocolate mousse onto the dacquoise disk.
  • Spread it with an offset or regular metal spatula.
  • Press a second dacquoise disk on the chocolate mousse.
  • Pipe on another layer of buttercream in a spiral. 
  • Spread it with an offset or regular metal spatula. (Use another 2 cups of the buttercream)
  • Use the reserved bottom layer of the layer cake, turned it over, as the top layer and place on top of the buttercream.
  • Brush it with the simple syrup.
  • Chill for at least 2 hours.
  • Ease open the springform pan and lift off the cake. 
  • Remove the plastic wrap.
  • Slide the ring back over the cake but don’t push it all the way down - let a small part of the ring surround the top of the cake to hold in the chocolate glaze. Fasten the springform pan.

  • Pour the glaze over the center of the cake. Rotate the cake so the glaze covers the top evenly. 
  • Chill for 30 minutes to set the glaze.
  • Ease open the springform pan and lift off the cake.
  • Mask the sides of the cake with a thin layer of buttercream using a regular metal spatula.
  • Hold the cake with one hand and use the other hand to gently press cake crumbs against the sides of the cake.
  • Decorate with buttercream rosettes.  Place a cherry or raspberry in the centre of each rosette.

The Baking book by James Peterson also taught us so much on pies, tarts and pastries, 


Custards, soufflés and fruit curds, 


Mousses too.


Basic techniques I’ve known all my life (and was taught at university) proved NOT the best method for the desired product.  


Since we started using James Peterson’s baking methods and techniques no recipe flops anymore!

We also bought two more books from James Peterson - Meat and Cooking.  More on that another time!


This posting is linked to:


With Love
Linnie


Blog Widget by LinkWithin